
Nothing provokes more stress than a big glue-up. Learning how to properly clamp your work is one of the most critical elements of success. But properly applying glue is also crucial. Here are some tips:
Mask Glue Joints Before Prefinishing
Finishing the parts of your project before you assemble them can be a great time-saver and allow you to get a better-quality finish. But for a strong glue joint, you have to keep the joints free of finish (glue doesn’t stick to varnish or stains very well). The solution is to apply masking tape to the surfaces that will be glued. Then remove it to expose raw wood when you glue up the project. Any good-quality masking tape will work. If you’ll be using a water-based finish, you’ll get the best results with a “no-bleed” tape such as green Frog Tape and ScotchBlue painter’s tape.
Wet both surfaces
It is important to get even, continuous glue coverage on the surfaces to be bonded, so apply yellow glue to both surfaces when you can. This provides instant wetting of both surfaces without relying on pressure and surface flatness to transfer the glue from one surface to the other. You will, however, have to work fast as the open time for yellow glue can be around five minutes at a temperature of 70O F (21O C) and relative air humidity of 50%.
Spread Glue With a Notched Trowel
When you’re gluing large surfaces, an inexpensive notched plastic trowel works great for spreading the glue. To find one, look in the flooring or tile section of the hardware store or home center. If you’re fortunate enough to have a pair of “pinking” shears in the family sewing basket, you can make our own spreader from an expired credit card.
Clamping time
Now long should the joint be subjected to clamp pressure? The time varies from species to species, with woods that have an even density across the growth rings, such as maple, requiring less time. But in general, the glueline reaches around 80% of its ultimate strength after 60 minutes of clamping. After this, joints can be released from the clamps, but the full glue strength won’t develop for about 24 hours.
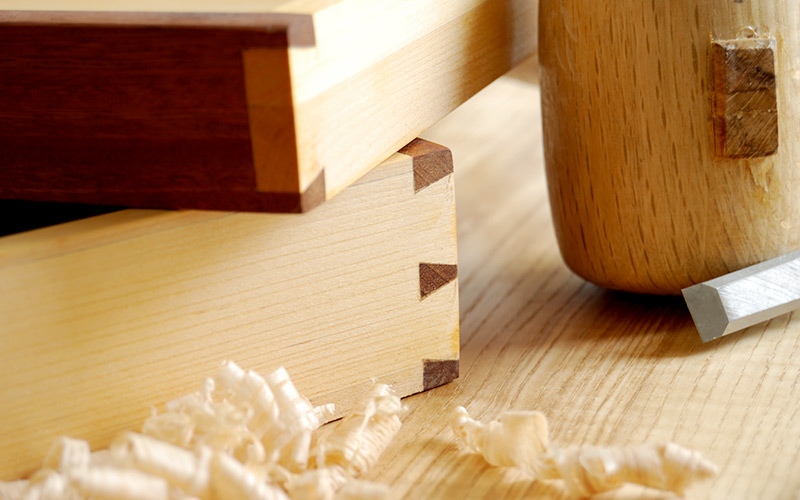
How strong is your glueline?
Even if you have used the correct pressure, it is still reassuring to make sure that you are achieving well-glued joints. A simple test is to place a sharp chisel exactly on the glueline, and strike it with a mallet.
A weak joint will split in the glueline, either because the glue was too thick or the glue didn’t penetrate the wood correctly. The percentage of wood failure will be very low or nonexistent. A good joint will split mostly in the wood adjacent to the glueline.