
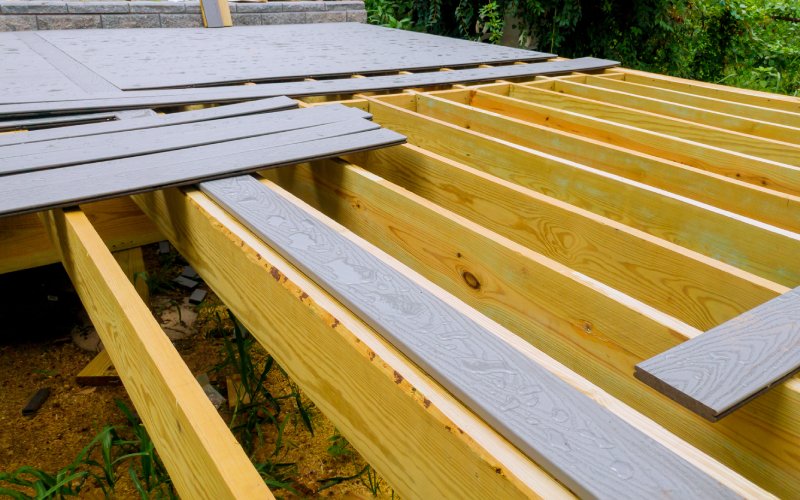
Remove Defective Deck Boards
Identify the deck boards you want to replace. If you are not removing the entire board, decide where to make the cuts. Offset cuts at least one joist space from the end of neighboring boards and ensure that the remaining portion of the old deck board, if any, and the new board span at least two joist spaces. Mark the cutting line with a pencil and a square. Cut the damaged deck board flush with the joist or along the center line of the joist with a circular saw. To avoid notching neighboring boards with the circular blade, use a jigsaw or oscillating multi-tool to finish the cut. If cutting along the centerline of the joist, remove any nails or screws from the cut line or offset the cut line to avoid them.
When using a pry bar to remove a board, place a block of wood underneath so it doesn’t damage adjacent deck boards. If you can’t remove a screw because the head is stripped, use an oscillating multitool or reciprocating saw to cut the screw flush with the stud. Use a cat’s paw to remove deeply sunken nails or cut them.
Inspect Beams, Joists And Posts
Removing deck boards will expose joists and rafters. Inspect for rot or other damage and verify that they are securely attached to the posts and board. Also inspect the beams for rot, especially if they come into contact with the ground. Check that the joist supports are plumb, free of rust, and are not missing any fasteners. If you find rot in any structural member, decide whether to repair or replace it and learn how to avoid and prevent rot in the future.
Add Support Battens And Reinforcing Beams
If necessary, add cleats or sister beams to support replacement deck boards and reinforce damaged beams. Fasten the batten/joist using framing nails or structural screws to the existing joist where you cut a deck board and anywhere a joist needs reinforcement. Make sure the top of each batten/joist is level with the top of the existing joist. Apply a sealant to the top of the joists to help them resist rot.
Cut New Deck Boards
Measure the distance between the existing deck boards. If possible, use a single board to span the distance and leave a 1/8-inch space for expansion at each end. Each board should span at least two joist spaces and the cuts should be staggered with those of neighboring deck boards. Avoid cuts that would leave knots at the ends of the board.
Apply Dye (optional)
Applying paint or stain can add years of life to new deck boards. It will also help the new boards blend in with
the old deck boards. If you are using wood that accepts stains or paints poorly, as is typical of pressuretreated wood, you may need to let the boards dry for several weeks before coating them. Sanding the boards can also help stain or paint adhere. Be sure to cover the end grain of the boards. For a distressed look to match existing boards, combine one (1) cup of baking soda with one (1) gallon of water, rub the solution into the wood and rinse. Allow the board to dry before coating and installing.
Install New Deck Boards
To prevent cupping, install new boards with the bark facing up, so the grain pattern is convex. Use 3-1/2-inch
deck screws to secure the boards. Drilling pilot holes will make the job easier and help prevent splitting, especially at the ends of the boards. When laying down new boards, make sure there is even spacing between each adjacent board.